|
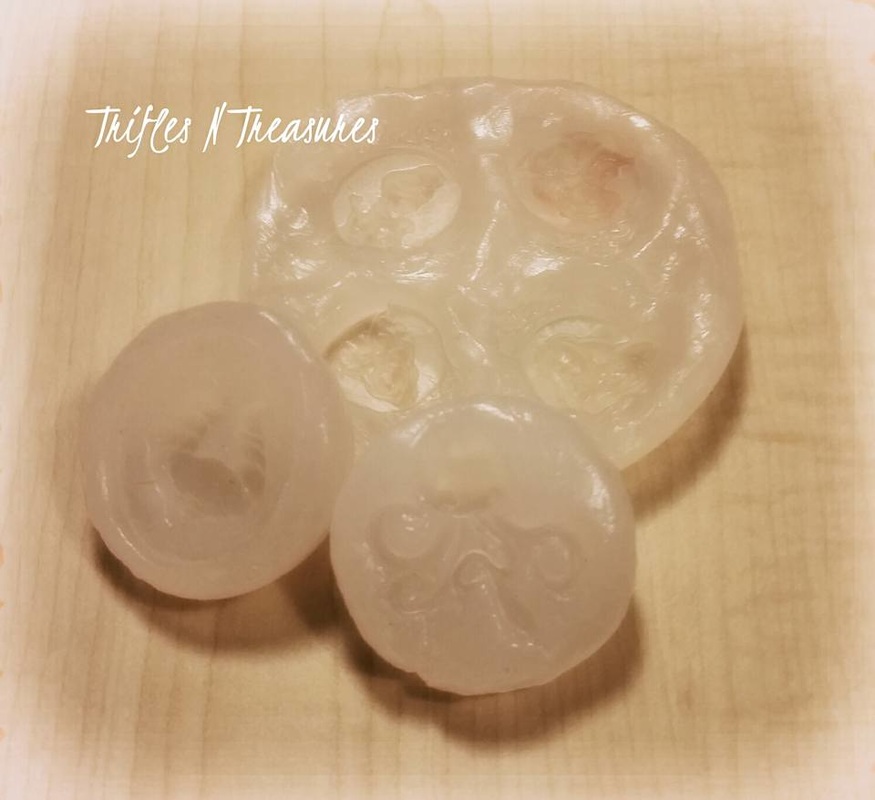
So...you want to make your OWN silicone molds? You have an amazing item, that you'd love to recreate, but can't figure it out? Cast it in silicone, and you can make a ton of them!
It is SO easy to do this, and SO much more cost effective...Of course, my first attempts at this were fairly bad. I watched videos with the cornstarch/baby powder method, and they came out stiff as a board. I tried the one that suggested a drop of vegetable oil~talk about a greasy mold! Then, I found a vague tutorial on making them with JUST silicone~YAY! So, after many attempts, I finally got it right, and I am sharing my step-by-step pics with you, so you can do it, too! Follow me for the fun part~ |
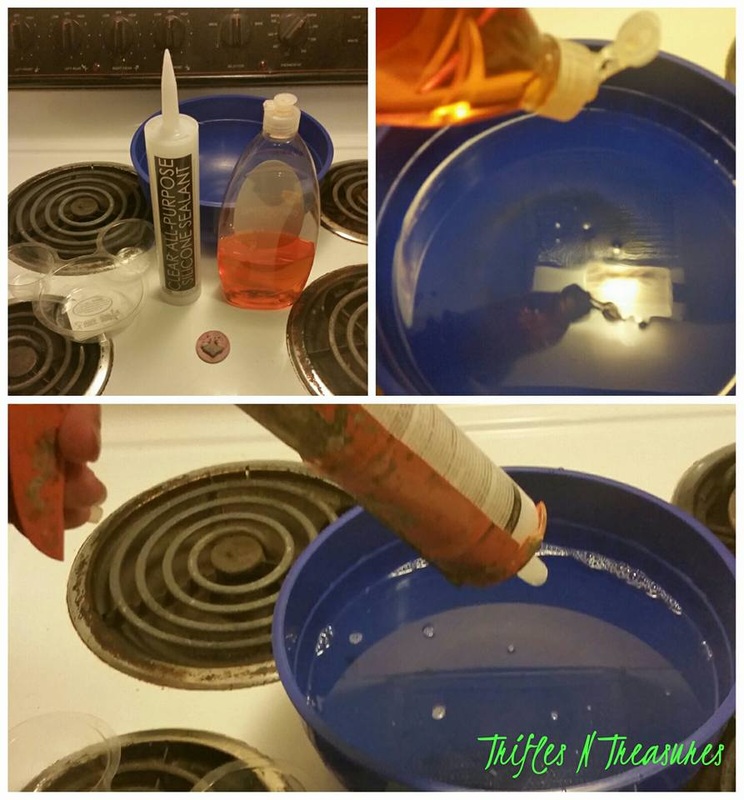
You also might want some kind of container to place your silicone in to cure. You could just plop it down on an empty plastic bag, or some plastic wrap, but I like this little lunchable-type container. It's the perfect size for the small molds I make, and even has a larger compartment, so I can make larger or multi-cavity molds!
You need a large container for the water/dish soap mixture~I used a simple large mixing bowl. And, of course, you need your item(s) to mold. I'm using a polymer clay piece that I sculpted myself, and want to be able to make more just like it :)
So, the first step is to fill your container with water. I went about halfway. Just lukewarm/room temperature water is fine. I haven't played around with hot or cold, to see if it makes a difference. Next, dump some dish soap in the water~say 1/2 to 3/4 of a cup, and kind of slosh it around, so it's mixed in, but not all sudsy.
Cut the tip off the silicone tube, and put it in your caulk gun. If you didn't get one, you'll need something large and solid to push the silicone out~and that works, but it's HARD~lol...
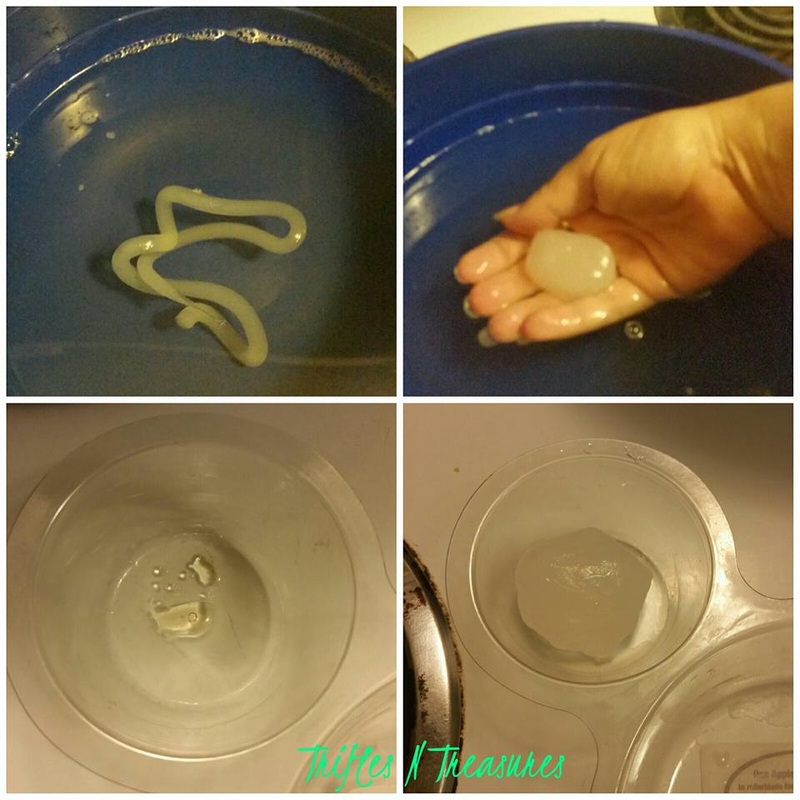
I can get by with just one squeeze of the trigger, for the size molds I make. If you are working with a large item, you made need to use more than that. That part is up to you.
Now, just reach into the water, and start clumping that goo together. You are better off keeping it under the water, if possible, and lightly kneading it for a few minutes, until it all sticks together, and forms a ball. You want it to start to firm up a bit, but not completely. I'd say 3-5 minutes is plenty, depending on how much you are using.
I put a drop or two of dish soap in my curing container, and spread it around, so that I won't have any trouble releasing the mold when it's ready.
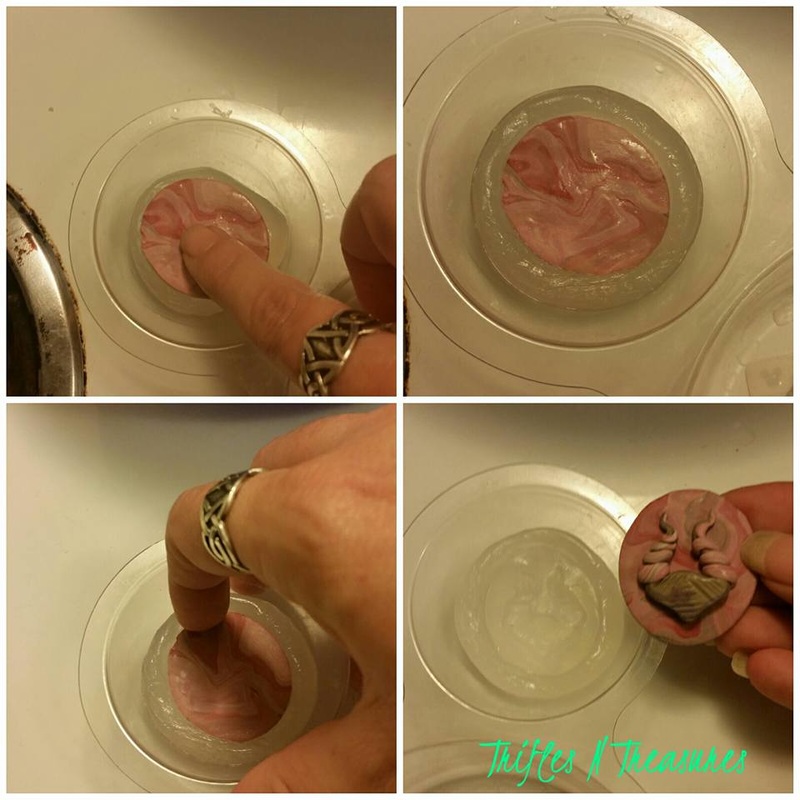
Once your silicone is nicely shaped, plop it into your curing container. I lightly press it out with my fingers, for a smooth impression surface.
Let the item set in the silicone for 30 minutes to an hour, to cure. Once the outer edges are no longer sticky to the touch, and it feels pretty firm, it is safe to remove your item~CAREFULLY.
After my item is removed, I let the mold cure completely~4-6 hours is probably enough time, but I let mine sit overnight. BEWARE~you will notice a strong smell of vinegar from this stuff while it is curing! The vinegar smell does go away after it's cured, though. If you are sensitive to this, just work in a well-ventilated area.
I hope you found this little tutorial helpful! Let me know if you have any questions I didn't cover~I'll try to answer anything I can!




 RSS Feed